Posted onEdited onInhtml Symbols count in article: 186Reading time ≈1 mins.
Introduction
How to implement lazy load images in html page?
Use loading=lazy attribute of img tag
With html5, you can use loading="lazy" attribute to lazy load images. This attribute tells the browser to defer loading of the image until it is needed. The browser will load the image when it is about to come into view.
1
<img src="image.jpg" loading="lazy" alt="描述性文字">
For old browsers which do not support loading attribute, you can use JavaScript to implement lazy load images.
1 2
<!-- HTML --> <imgdata-src="image.jpg"class="lazyload"alt="描述性文字">
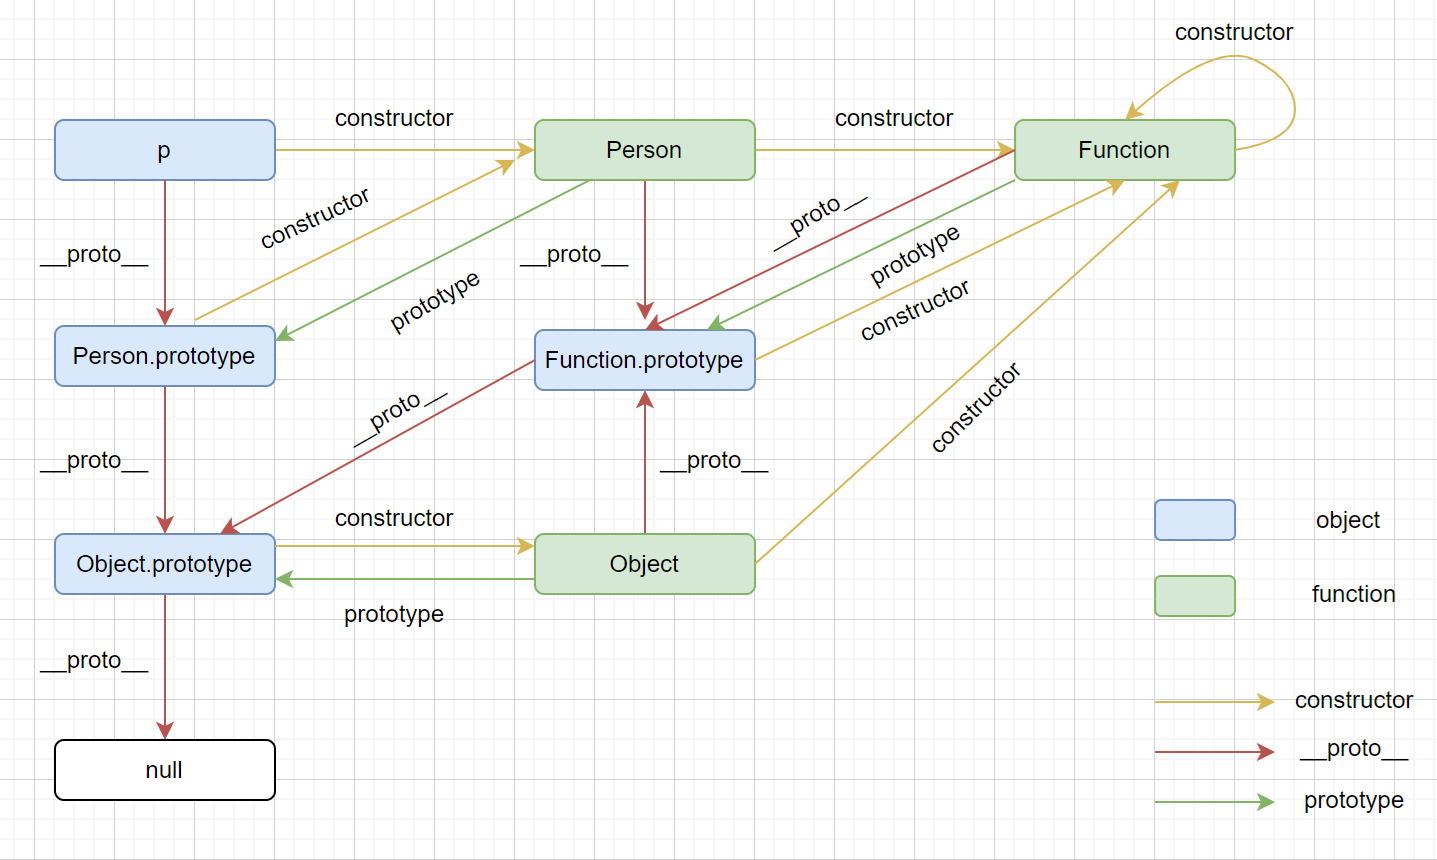
p.foo() - p对象上没有foo属性,向上查找到Person,Person的原型对象上也没有foo属性,继续向上查找到Object,Object的原型上还是没有foo属性,继续向上查找到null,而null上也没有foo属性,所以会报错。— TypeError: p.foo is not a function
prototype is an very important concept in JavaScript. It’s used to implement inheritance in JavaScript.
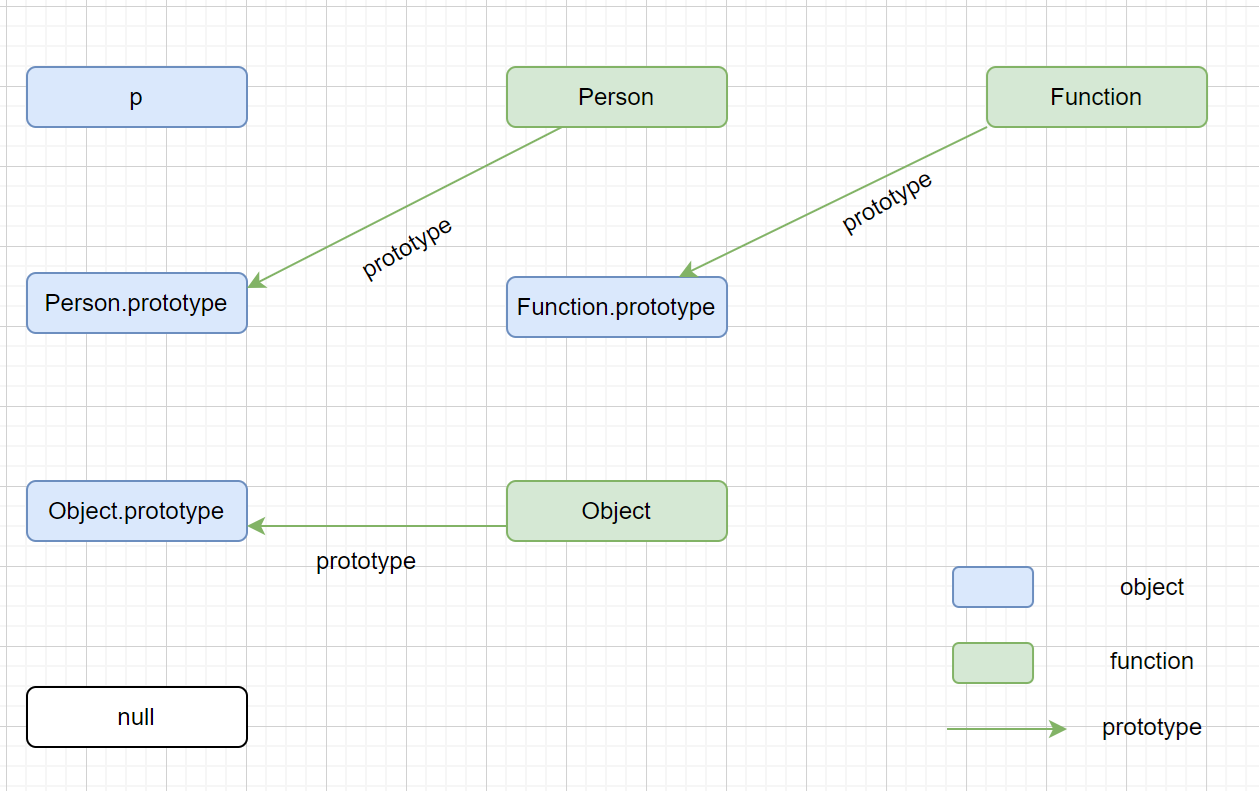
prototype is a property of a function, it’s an object. When you create a function, JavaScript engine will automatically create a prototype object for you. This object has a property called constructor, which points back to the function.
The prototype data property of a Function instance is used when the function is used as a constructor with the new operator. It will become the new object’s prototype.
Take the following code as an example, its prototype is an empty object {}.
When you create an instance of Person, the instance will have a property called __proto__, which points to the prototype of the constructor function(the Person function).
1 2 3 4 5 6 7 8 9 10 11
functionPerson(name) { this.name = name; }
Person.prototype.printName = function () { console.log(this.name); };
const person = newPerson('Philip'); console.log(person.__proto__ === Person.prototype); // true console.log(person.printName()); // Philip
Functions defined on the prototype are shared by all instances of the constructor function.
1 2 3 4 5 6 7 8 9 10 11
functionPerson(name) { this.name = name; }
Person.prototype.printName = function () { console.log(this.name); };
functionmyInstanceof(obj, constructor) { let proto = obj.__proto__; while (proto) { if (proto === constructor.prototype) { returntrue; } proto = proto.__proto__; } returnfalse; }
functionmyInstanceof(obj, constructor) { let proto = Object.getPrototypeOf(obj); while (proto) { if (proto === constructor.prototype) { returntrue; } proto = Object.getPrototypeOf(proto); } returnfalse; }