You can use this lifecycle hook to manually check for state changes outside of Angular's normal change detection, manually updating the component's state.
Posted onEdited onInangular Symbols count in article: 980Reading time ≈4 mins.
Introduction
Directives are classes that add additional behavior to elements in your Angular applications.
Angular has many kinds of directives, including components, attribute directives, and structural directives.
Component
This is the most common one we used every day, a component is a directive with a template. Components are the most basic building block of an Angular application. https://angular.dev/guide/components
Structural Directives
Structural directives are responsible for HTML layout. They shape or reshape the DOM’s structure, typically by adding, removing, or manipulating elements.
NgIf
NgIf is used to conditionally creates or disposes of subviews in a template. see this post for more details.
Attribute directives are used to change the appearance or behavior of an element, component, or another directive. They are usually applied to elements as attributes.
Attribute directives doesn’t change the layout of the template, just change the appearance of it, for example, change the color, font size, visibility etc.
The most common attribute directives are as follows:
Before standalone component, Two components in different module can’t communicate with each other directly, they need to communicate by their enclosing module. See here for more details.
Angular and MVVM
Angular is a MVVM framework, it’s a bit different from MVC.
Model: Data types and Services
View: HTML template
ViewModel: Component
In MVVM pattern, Model and View doesn’t communicate directly. ViewModel is a mediator between Model and View, it’s a class that contains the business logic of the application. In Angular, ViewModel is a Component.
Posted onEdited onInangular Symbols count in article: 1.2kReading time ≈4 mins.
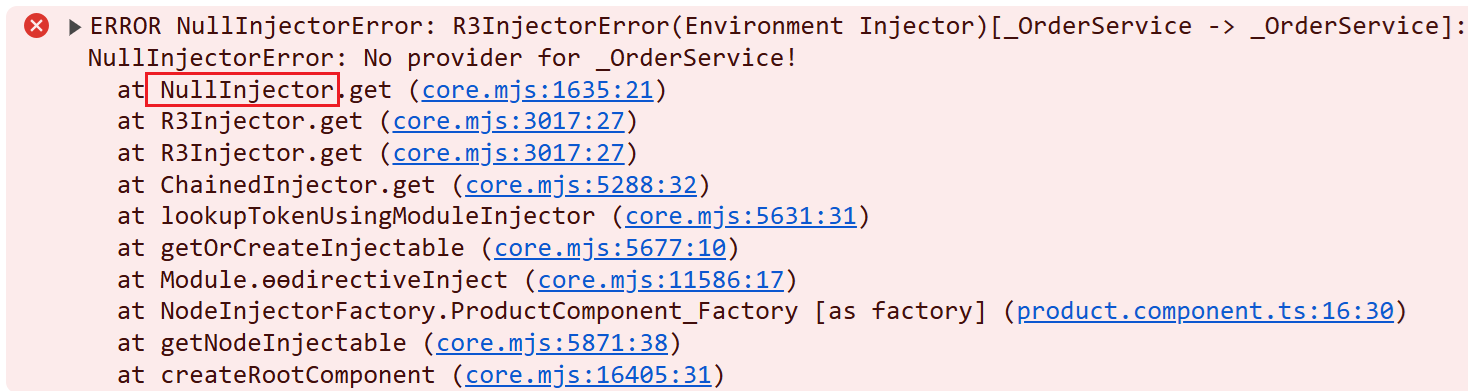
In Angular, the resolution modifier is used to control how the dependency injector resolves dependencies. There are four resolution modifiers in Angular:
ERROR NullInjectorError: R3InjectorError(Environment Injector)[_OrderService -> _OrderService]:
  NullInjectorError: No provider for _OrderService!
    at NullInjector.get (core.mjs:1635:21)
    at R3Injector.get (core.mjs:3017:27)
    at R3Injector.get (core.mjs:3017:27)
    at ChainedInjector.get (core.mjs:5288:32)
    at lookupTokenUsingModuleInjector (core.mjs:5631:31)
    at getOrCreateInjectable (core.mjs:5677:10)
    at Module.ɵɵdirectiveInject (core.mjs:11586:17)
    at NodeInjectorFactory.ProductComponent_Factory [as factory] (product.component.ts:21:30)
    at getNodeInjectable (core.mjs:5871:38)
    at createRootComponent (core.mjs:16405:31)
core.mjs:7191 ERROR RuntimeError: NG0201: No provider for _OrderService found in NodeInjector. Find more at https://angular.dev/errors/NG0201
    at throwProviderNotFoundError (core.mjs:986:9)
    at notFoundValueOrThrow (core.mjs:5606:5)
    at lookupTokenUsingModuleInjector (core.mjs:5639:10)
    at getOrCreateInjectable (core.mjs:5677:10)
    at Module.ɵɵdirectiveInject (core.mjs:11586:17)
    at NodeInjectorFactory.ProductComponent_Factory [as factory] (product.component.ts:21:30)
    at getNodeInjectable (core.mjs:5871:38)
    at createRootComponent (core.mjs:16405:31)
    at ComponentFactory.create (core.mjs:16262:21)
    at ViewContainerRef2.createComponent (core.mjs:16662:43)